Retail shelf space is money. Every inch counts when you’re trying to display products neatly and keep things moving. Shelf pushers help stores do that by making sure products always stay at the front. But here’s the big question: should you install shelf pushers yourself, or bring in the pros?
DIY shelf pusher installations can work for some retailers, especially with smaller stores or simple setups. But for complex layouts, heavy usage, or large chains, professional installation may save time, cut costs in the long run, and ensure consistency.
Let’s look at the good and bad sides of both options so you can make a smart choice that fits your store, your team, and your budget.
What Are Shelf Pushers and How Do They Work?
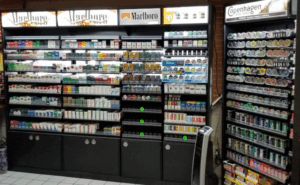
Every time you walk into a grocery store and see neatly aligned rows of cans or bottles, there’s a good chance shelf pushers are doing the hard work behind the scenes.
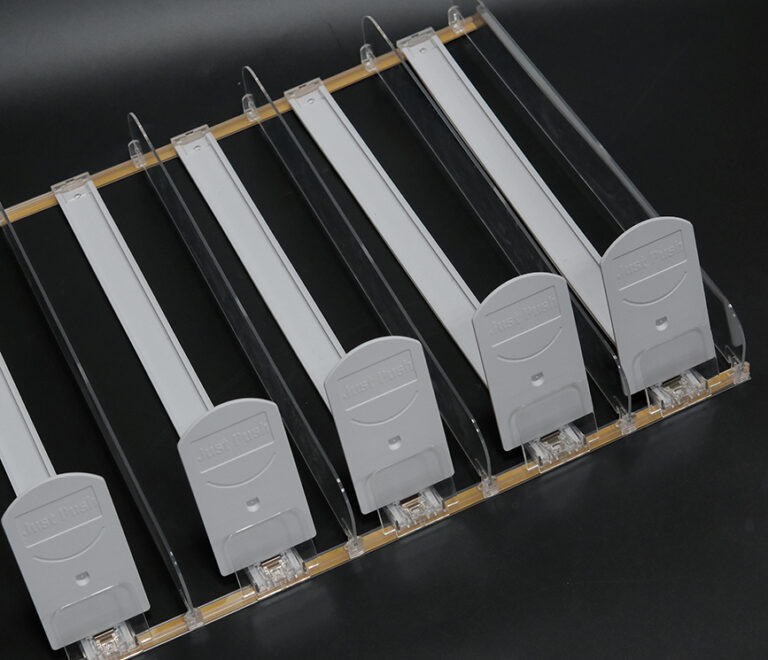
Shelf pushers are spring-loaded or gravity-driven systems that push products forward as items are taken. These systems sit behind your products and apply gentle pressure to keep the front of the shelf full. No more reaching into the back. Just easy access for customers and a clean look for your store.
Types of Shelf Pushers
| Pusher Type | How It Works | Best For |
|---|---|---|
| Spring-loaded | Uses tension to push items forward | Packaged goods, snacks |
| Gravity-fed (roller) | Uses a slope and rollers to move items | Bottles, cans, heavy products |
| Manual guides | Rely on store staff for restocking | Budget setups or small stores |
Each type has its pros and cons. The right one depends on your product shape, shelf size, and how fast things sell.
Why They Matter
For store owners, shelf pushers save time. Less staff effort. Better product rotation. And a polished look that keeps customers happy. But getting the benefits depends on installing them the right way—which brings us to the big decision.
Is It Easy to Install Shelf Pushers Yourself?
It depends. Installing pushers sounds simple—just attach, slide in, done. But reality often looks different.
DIY installation of shelf pushers is possible for small-scale applications, but can get tricky with larger stores, multiple shelf types, or heavy products.
Most systems come with basic instructions. Some even snap in place without tools. But if you’re working with curved shelves, tight corners, or different product sizes, that “easy” job turns into hours of adjustments.
Common DIY Setup Challenges
| Challenge | Description |
|---|---|
| Shelf mismatch | Pushers don’t align with shelf depth or width |
| Inconsistent pusher tension | Uneven push leads to product tipping |
| Loose fittings | Parts fall off with frequent customer handling |
| Wasted time | Redoing steps slows down staff productivity |
Tools You Might Need
- Measuring tape (for shelf dimensions)
- Utility knife (for trimming dividers)
- Screwdriver or drill (for mounts)
- Cleaning supplies (remove dust for strong adhesion)
If your team is handy and shelves are standard size, DIY might work well. But when things get tricky, mistakes cost time—and sometimes money.
What Tools Do You Need for a DIY Setup?
If you’re set on doing it yourself, prep is everything. Having the right tools can cut your install time in half and avoid headaches.
To install shelf pushers yourself, you’ll need measuring tools, trimming tools, mounting hardware, and a clear layout plan. Some tools are basic. Others might need to be bought or borrowed. It depends on the shelf material and product type.
Basic DIY Tool Checklist
| Tool | Purpose |
|---|---|
| Measuring tape | Ensures pushers fit the shelf properly |
| Pencil and ruler | For marking positions |
| Box cutter or snips | Cuts divider strips to size |
| Level | Keeps pushers aligned straight |
| Drill or screwdriver | For secure bracket attachment |
| Adhesive strips or tape | Mount lightweight components |
| Cleaning cloth/alcohol | Clears dust to help glue stick better |
Tips for Efficient Setup
- Plan first: Draw a layout so you’re not figuring it out as you go.
- Label everything: If you’re doing many shelves, keep things organized.
- Test one unit: Try one full setup before repeating across the store.
- Watch for shelf variations: Even shelves in the same unit can vary slightly.
Taking an extra 15 minutes to plan can save hours of rework. But if that’s not your team’s strong suit, the professional option may sound better.
How Much Time Does DIY Installation Usually Take?
Time is money. And while DIY sounds like a cost-saving move, it’s important to look at the clock, not just the budget.
DIY shelf pusher installation takes anywhere from 10 minutes per shelf to several hours for an entire aisle, depending on store size and complexity.
That may not sound like much, but multiply it by 50 shelves in a small supermarket, and you’re easily looking at multiple staff days.
Example Time Breakdown
| Task | Estimated Time per Shelf |
|---|---|
| Measuring and marking | 2-3 minutes |
| Cutting dividers or pushers | 3-5 minutes |
| Mounting components | 4-6 minutes |
| Testing and adjusting | 2-4 minutes |
| Total per shelf | 10-18 minutes |
For a 5-shelf section, that’s roughly 50–90 minutes. Multiply by aisle length, and it adds up fast.
When DIY Saves Time
- One or two shelves
- Standard shelf sizes
- One pusher type only
When It Eats Time
- Different products on each shelf
- Frequent layout changes
- High staff turnover (more training needed)
If your staff is already stretched, handing off this job might be the better call.
What Are the Common Mistakes in DIY Installations?
Let’s be honest—DIY can go wrong. Not because you’re not smart, but because shelf setups are more technical than they look.
The most common DIY shelf pusher mistakes include poor alignment, improper spacing, weak adhesion, and mismatched components.
Mistake Breakdown
| Mistake | What Happens |
|---|---|
| Pushers not aligned | Products slide off track |
| Wrong pusher type used | Items jam or don’t move |
| Inconsistent spacing | Shelves look messy and products tip |
| Adhesive fails | Parts fall off after a few days |
| Forgetting product rotation | Old stock gets stuck behind newer items |
Fixes and Prevention
- Always double-check shelf measurements before trimming
- Don’t skip cleaning before applying adhesives
- Keep instructions on hand—even experienced staff forget details
- Try one shelf first before doing the full aisle
A little extra attention upfront saves a lot of frustration down the road.
When Should You Hire a Professional Installer?
You might be thinking, “This is a lot.” And you’re right. If you’re short on time, patience, or a large team—call in the pros.
You should hire a professional for shelf pusher installation if you’re managing large-scale rollouts, have complex fixtures, or want guaranteed consistency.
Professional Setup Advantages
| Advantage | Description |
|---|---|
| Time efficiency | Teams complete full aisles in hours |
| Consistency | Same look and alignment across locations |
| Expert adjustments | Fit for any shelf type or layout |
| Warranty-backed work | Reduces liability from installation errors |
Professional services may also offer layout consulting and even product performance tracking as part of the setup. For multi-location chains or premium stores, the value adds up.
How Much Does Professional Installation Typically Cost?
Cost is often the deciding factor between doing it yourself and calling a professional. But the price tag doesn’t always tell the whole story.
Professional shelf pusher installation typically ranges from \$5 to \$15 per shelf, depending on the shelf size, store layout, pusher type, and location.
Of course, the cost varies by region and service provider. Some charge by the shelf, some by the hour, and others offer fixed prices for whole projects.
Cost Breakdown by Service Type
| Service Type | Average Cost Per Shelf | Notes |
|---|---|---|
| Basic setup (standard shelves) | \$5 – \$7 | Flat shelves with simple pushers |
| Intermediate (custom layouts) | \$8 – \$12 | Includes measurement and adjustment |
| Full-service install | \$12 – \$15+ | Includes layout, fitting, and testing |
Hidden Value in Professional Cost
At first glance, DIY might look cheaper. But don’t forget to count the following:
- Staff wages: A few days of team labor can exceed installation fees
- Errors and rework: Mistakes cost time and money
- Lost sales: Poor setups lead to poor product visibility
If you’re running a chain or redesigning a whole department, paying more upfront often means smoother operations later.
Are There Long-Term Benefits to Hiring Experts?
This isn’t just about the install day. It’s about the weeks and months that follow. How often do you want to redo things?
Hiring experts can deliver long-term benefits like improved product presentation, fewer maintenance needs, and fewer replacement costs due to misaligned hardware.
Benefits Over Time
| Benefit | How It Helps Long-Term |
|---|---|
| Accurate alignment | Fewer resets and adjustments needed |
| Reduced product damage | Less tipping and breakage |
| Increased product visibility | Boosts customer experience and sales |
| Better stock rotation | Older items sell first, reducing waste |
| Clean aesthetic | Supports branding and store layout goals |
Real Example
Let’s say you spend \$800 on professional setup for 100 shelves. That’s \$8 per shelf.
If this leads to:
- 5% more product visibility
- 10 minutes saved per shelf per week on restocking
- Better product freshness
You get that \$800 back fast. And most importantly, you avoid rework headaches.
Which Setup Offers Better Shelf Stability Over Time?
Here’s where quality speaks for itself. A shelf that looks perfect on day one is useless if it’s a mess two weeks later.
Professional installations usually offer better long-term shelf stability due to proper alignment, firmer fittings, and tested methods. DIY setups can work too—but only if executed with care and precision.
What Impacts Stability?
| Factor | DIY Setup Risk | Pro Setup Advantage |
|---|---|---|
| Pusher alignment | May be off by a few millimeters | Precision-fit tools ensure accuracy |
| Mounting firmness | Depends on adhesive or screws | Uses tested brackets and anchors |
| Shelf variance handling | Hard to adjust for curve/tilt | Experts customize each unit |
How to Improve DIY Stability
If you’re committed to doing it yourself, here’s what helps:
- Use a leveling tool on each shelf
- Secure with extra mounts at weak spots
- Recheck spacing after loading items
Stability isn’t just a “bonus”—it keeps your store running smoothly and safely.
Can Improper Installation Affect Product Visibility?
Absolutely. In fact, this is one of the most common issues with DIY shelf setups. Poor visibility = missed sales.
Improper installation affects product visibility by causing gaps, uneven fronts, and misaligned rows that confuse shoppers and reduce grab-and-go decisions.
Visibility Mistakes That Hurt Sales
| Installation Error | Result in Store |
|---|---|
| Uneven shelf fronts | Products look unorganized |
| Tilted pushers | Items lean or fall backwards |
| Inconsistent spacing | Some items are hidden |
| Bad product rotation | New items block older stock |
Why Visibility Matters
- Customers make decisions fast. If they don’t see a product right away, they won’t buy it.
- Visual order builds trust. A tidy shelf tells shoppers you care about quality.
- Branded placement loses impact. If a featured item is blocked, your promo fails.
Even a 2% drop in visibility can mean thousands lost over time. That’s a big risk to take if you’re hoping to save a few dollars with DIY.
How Do Maintenance Needs Differ Between the Two Options?
Here’s the part most people forget to ask: once it’s installed, who’s keeping it running?
Professional installations usually need less maintenance because of better fitting, material choices, and layout optimization. DIY setups often require more frequent checks and realignments.
Maintenance Comparison
| Factor | DIY Setup | Professional Setup |
|---|---|---|
| Weekly inspections | Often needed | Usually minimal |
| Part replacements | More frequent if parts misaligned | Rare unless high wear zones |
| Product jamming | Can happen if layout is off | Less likely with expert spacing |
| Restocking alignment | Needs regular fixing | Stable and consistent |
DIY Maintenance Tips
- Check pushers weekly for debris or blockages
- Wipe down surfaces to avoid dust build-up
- Mark alignment points on shelves to spot drift
The more complex your layout, the harder DIY becomes to maintain. If you’re a single-location store with one layout? DIY might hold up just fine. But for multi-use or rotating setups, expert help pays off.
What Do Retailers Recommend for New Store Setups?
When launching a new location, everything matters: branding, layout, and speed. So what’s the norm?
Most retailers recommend professional shelf pusher installation for new store openings to ensure speed, consistency, and professional polish.
Why Go Pro from Day One?
| Reason | Benefit |
|---|---|
| Time pressure | Experts complete installs faster |
| Brand impression | Clean shelves from opening day |
| Layout testing | Pros spot and solve design flaws |
| Staff training included | Teams learn faster on day one |
Experienced retailers know: first impressions stick. If a customer sees sloppy shelves, they won’t care how great your product is.
Should You Combine DIY and Professional Methods?
Here’s a trick smart retailers use: do some yourself, outsource the rest.
Combining DIY and professional shelf pusher installation allows flexibility—use internal teams for simple areas, and pros for complex, high-traffic zones.
Smart Hybrid Strategies
| Area | Suggested Setup |
|---|---|
| Beverage aisles | Professional (heavy products) |
| Candy/snack displays | DIY (standard shelves) |
| Seasonal endcaps | Professional (rotating products) |
| Backroom storage | DIY (low visibility) |
This approach gives you cost control without sacrificing consistency. Just make sure your teams are trained and the layout plan is clear.
Conclusion
Shelf pushers do more than tidy up your store—they help you sell smarter. Whether you install them yourself or bring in the experts, the key is understanding what works best for your setup, staff, and goals.
DIY is doable. It saves money upfront. But it also requires time, planning, and attention to detail. One small mistake can ripple into restocking problems, customer frustration, and even safety risks.
Professional setup costs more, yes—but it buys peace of mind, consistency, and a polished look from the start.
For many, the best option might be a mix of both. Handle simple layouts in-house. Call in the pros for big or sensitive areas. That way, your store always looks its best—without breaking the bank.
Let me know if you’d like a table of contents, internal linking suggestions, or visuals to go with this article.