Getting products to stay neat and front-facing on retail shelves isn’t always easy. That’s why shelf pusher systems are a smart investment. But for them to actually work as promised, they must be correctly aligned. Poor alignment leads to misfiring pushers, jammed merchandise, or crooked displays. The good news? With a little planning, anyone can align pushers correctly—even on shelves that aren’t perfect.
To align shelf pushers effectively, position each pusher rail straight and parallel to the shelf front, centered beneath the product’s weight, and spaced consistently across the shelf width. Proper alignment ensures smooth product flow, avoids jams, and maintains uniform presentation.
If you’re installing a shelf pusher system and want reliable, good-looking results, there are a few key details to get right. This article breaks down each of those questions—step by step.
What Tools Are Needed to Align Shelf Pushers?
Even simple systems need the right tools to install and align pushers properly. Missing a basic item like a level or ruler can lead to misalignment.
You’ll typically need a ruler or measuring tape, a spirit level, adhesive or mounting hardware, a non-permanent marker for guides, and sometimes a pusher rail jig for large setups.
H3: Basic Tool Checklist
| Tool | Use Case |
|---|---|
| Ruler or tape measure | Ensures even spacing between pushers |
| Spirit level | Confirms pusher tracks are straight |
| Marker or pencil | Temporary markings during setup |
| Mounting strips | Adhesive backing or screw bases for rails |
| Rail alignment jig | Speeds up setup on high-volume shelves |
Most setups only require hand tools and careful measuring. For wire shelves, you may also need clips or a support tray. If pushers slide or tilt, use the level again and readjust.
How Far Apart Should Shelf Pushers Be?
Too close, and products jam. Too far, and items tilt or fall sideways. Finding the right spacing makes all the difference.
Shelf pushers should be spaced based on product width plus 1–2 mm for smooth sliding. Crowding or gaps reduce the pusher’s effect and create a poor visual result.
H3: Measuring for Accurate Spacing
Start by measuring your product’s width at its widest point. Add a small margin for glide—no more than 2 mm. Then divide the total shelf width by the full product width (product + margin) to see how many pushers fit.
H3: Sample Product Width Calculation
| Product | Width (mm) | Recommended Pusher Spacing (mm) |
|---|---|---|
| Beverage bottle | 65 | 66–67 |
| Candy box | 45 | 46–47 |
| Frozen meal tray | 130 | 131–132 |
Uniform spacing across a shelf creates consistent visual merchandising. Irregular spacing makes the display look messy and may cause some pushers to work harder than others.
What’s the Best Way to Center Shelf Pushers?
Alignment isn’t just about left and right—it’s also about front-to-back positioning. If the pusher doesn’t match the center of the product’s gravity, it won’t push evenly.
Center each pusher underneath the middle of the product to keep pressure balanced. Misalignment causes sideways force and can push items crooked or off-track.
H3: Why Centering Matters
If the pusher force doesn’t act on the center of the product, the item may tilt. Lightweight packaging—like boxed snacks or clamshell packaging—can shift easily. That’s why exact center alignment matters for more than just looks.
H3: Tips for Getting It Right
- Use a cardboard template with a centerline.
- Mark shelf surface with temporary guides.
- Test with two products first, then replicate the setup.
For curved or irregular packaging, use adjustable dividers or side rails to control item position.
How Do You Ensure Pushers Stay Aligned?
Even if you align them well once, shelf pushers can shift over time—especially with frequent stocking.
To maintain alignment, use fixed base rails or adhesive mounting. Avoid setups that rely only on friction or gravity. Periodically check for wear, loosening, or shelf warping.
H3: Common Causes of Misalignment
| Cause | Solution |
|---|---|
| Weak adhesive on base rail | Use stronger tape or screw mounts |
| Overloaded pusher tracks | Use dividers or stronger springs |
| Shelf surface not level | Add leveling strip or tray |
| Excessive product force | Reduce spring tension if adjustable |
Store staff often overlook routine inspections. But rechecking alignment during restocking can prevent display failures later.
Can Shelf Pushers Be Adjusted After Installation?
Sometimes you change product types or reconfigure a shelf plan. The pushers you set yesterday may not work today.
Yes, most shelf pushers are adjustable. You can reposition or replace them by removing the rail, shifting guides, or inserting different width models.
H3: When Adjustment Is Needed
- New product size doesn’t fit old spacing
- Display changed from vertical to angled shelf
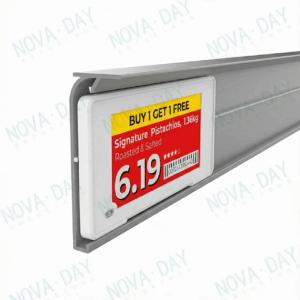
- Labels or price tags get blocked by pusher heads
H3: Tips for Easy Adjustment
- Choose pushers with sliding base guides
- Avoid using permanent adhesives during testing
- Label your pusher types and widths for quick swaps
Modular systems like those from Novaday allow full reconfiguration without replacing the entire rail. That’s ideal for seasonal retail changes or fast-moving planogram updates.
What Common Mistakes Happen During Alignment?
Even experienced merchandisers make small errors that reduce pusher effectiveness.
The most common mistakes include uneven spacing, misaligned rails, installing pushers off-center, or failing to secure base rails properly.
H3: Mistake vs Solution Table
| Mistake | Problem Caused | Fix |
|---|---|---|
| Rails not parallel | Pushers jam or products tilt | Use a level and alignment jig |
| Spacing too wide | Products shift and misface | Measure actual product width |
| Pushers misaligned laterally | Products pushed at an angle | Center each rail beneath product |
| Base rails unsecured | Pushers slide or detach | Use screws or strong adhesives |
Regular visual checks, simple measuring tools, and documentation can help avoid these issues.
Do Different Products Need Different Alignment?
Not all products behave the same. Heavy, soft, or oddly-shaped items need more support than a standard box.
Yes, each product type may require different pusher strength, spacing, and rail width. Uniform setups don’t work well across varied SKUs.
H3: Product Category Differences
| Product Type | Alignment Needs |
|---|---|
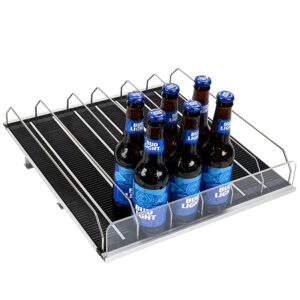
| Bottled beverages | Strong spring pushers, firm divider walls |
| Lightweight snacks | Low-tension pushers, closer spacing |
| Cosmetics | Narrow rails, adjustable guides |
| Frozen goods | Cold-resistant rails, firm edge stops |
Changing SKUs? Recheck alignment. Not doing so can increase product damage or reduce facing effectiveness.
How Does Pusher Spacing Affect Product Facing?
Facing is the retail term for how products line up visually at the shelf front. Poor spacing = poor facing.
Pusher spacing directly impacts how neat, consistent, and accessible products appear. Proper spacing keeps facings uniform and enhances shelf appeal.
H3: Visual Examples
| Spacing Scenario | Result |
|---|---|
| Even spacing | Clean lines, full product visibility |
| Wide gaps between items | Empty-looking shelf, lost sales |
| Tight spacing | Product jams, bulging facings |
For brands, perfect facings reinforce trust. For stores, they increase impulse sales. For shoppers, they reduce decision fatigue.
What Role Do Dividers Play in Alignment?
Pushers guide forward motion. Dividers control side-to-side movement.
Dividers are essential in keeping products straight and aligned between pusher lanes. Without them, items drift sideways, especially on wider shelves.
H3: Divider Use Table
| Shelf Width | Divider Needed? | Recommended Type |
|---|---|---|
| < 60 cm | Optional | Low side wall or rail edge |
| 60–90 cm | Recommended | Clip-on acrylic panels |
| > 90 cm | Required | Full-length PET dividers |
Dividers also help in mixed-SKU shelves. Without them, smaller items may slide into other lanes. PET and acrylic materials are best for clean, modern look.
Should Pushers Be Aligned With Product Edges?
Sometimes it’s tempting to align pushers based on shelf or label space instead of the actual product shape.
Pushers should be aligned with the product’s widest edge—not the shelf label area or packaging seam. This ensures stable pressure and centered display.
For tapered products like bottles, base width matters most. For square boxes, measure both front and side to see if it’s symmetrical. Never eyeball it—always measure.
How Often Should Shelf Pusher Alignment Be Checked?
Shelves get restocked often. Pushers shift. Products change.
Shelf pusher alignment should be checked weekly or during every major restocking. Misalignment tends to go unnoticed until sales are affected.
Set a schedule. Train staff. Include alignment as part of regular merchandising audits. A five-minute check can prevent five days of lost sales.
Conclusion
Aligning shelf pushers sounds simple—but it takes precision, the right tools, and a little bit of retail science. From measuring spacing and centering to avoiding common mistakes and choosing the right accessories, everything affects how well your pushers perform.
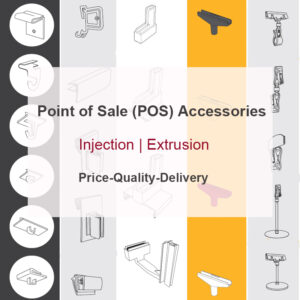
If your store needs help setting up shelf pusher systems or customizing them for new layouts, Novaday can provide OEM support, mounting guides, or even shelf-specific rail kits. Whether you’re outfitting supermarkets, convenience stores, or cosmetic displays, we’re ready to help your pushers push better.