Retailers want neat, functional shelves—but not at the cost of damaging fixtures. That’s the headache many face when installing shelf pushers. A single misstep could scratch surfaces, loosen materials, or ruin expensive shelving. If you’re in charge of installations, or sourcing pusher systems, this guide is for you.
To install shelf pushers without damaging shelves, choose non-invasive mounting methods like adhesive bases or snap-fit designs, use correct tools, and follow careful alignment procedures. Avoid drilling or forced pressure on delicate materials like glass or coated metal.
This post will show you the most shelf-safe ways to install pushers—no dents, no scratches, no regrets. We’ll cover tools, shelf types, mounting styles, and error-prone techniques to avoid.
What tools do you need to install shelf pushers?
Most shelf pushers today are designed for easy installation. But using the wrong tools—or worse, forcing them by hand—can cause damage to the shelf surface or the pusher itself.
Common tools for shelf pusher installation:
| Tool | Purpose | Shelf Safety Impact |
|---|---|---|
| Soft measuring tape | To ensure accurate alignment | No damage risk |
| Plastic squeegee | Presses adhesive pads evenly without dents | Low damage risk |
| Rubber mallet | For snap-on brackets on metal/plastic shelves | Safer than metal hammers |
| Level ruler | To check pushers are even | No damage risk |
| Heat gun (optional) | To soften adhesives for cleaner removal | Must be used cautiously |
Avoid tools that can damage
- Avoid metal hammers or screwdrivers unless the product specifically requires it.
- Drills should only be used if the shelf is wood and non-coated.
- Sharp blades can scratch shelf surfaces if used to trim adhesives.
Pro Tip:
Pre-plan your shelf layout with a simple drawing before installing anything. This minimizes repositioning—which is where most damage happens.
Can shelf pushers be added to glass shelves safely?
Glass shelves are common in cosmetics, electronics, and boutique retail. But they pose unique risks—too much pressure and they’ll crack. That’s why choosing the right type of shelf pusher is critical here.
Best practices for glass shelf installation:
- Use adhesive-based pushers with rubber pads.
- Avoid screw-mounted or clip-in types that grip edges too hard.
- Use non-slip pads underneath to prevent shifting during stocking.
Shelf pusher types suitable for glass:
| Pusher Type | Safe for Glass? | Notes |
|---|---|---|
| Adhesive base pushers | ✅ Yes | Choose ones with cushioning layer |
| Magnetic base pushers | ❌ No | Glass is non-metallic; magnet won’t work |
| Screw-mounted pushers | ❌ No | May shatter or chip the shelf |
| Clip-on with soft grips | ✅ Yes (cautious) | Only if the clip has silicone cushioning |
Watch out for:
- Pushers with sharp plastic edges.
- Weight of stocked products—some systems can shift under heavy loads.
- Uneven alignment which causes tension at one end of the glass.
How do you secure pushers without using screws?
Screwless mounting is often the best way to keep shelves intact—especially with metal or coated wood. Adhesive, click-lock, or hook-in systems are now the go-to options for retailers wanting clean installs.
Popular screwless mounting methods:
| Method | Installation Type | Shelf Compatibility |
|---|---|---|
| 3M VHB Adhesive | Peel-and-stick | Metal, wood, glass |
| Snap-fit bracket | Clicks into shelf holes | Perforated metal/wood shelves |
| Hook rail system | Slides into back rail | Supermarket gondolas |
Adhesive tips:
- Always clean the shelf surface with isopropyl alcohol first.
- Let adhesive cure for 24 hours before adding product weight.
- Avoid re-sticking more than once—adhesive weakens.
Note:
Never apply adhesive over dust or grease. It weakens grip and may damage shelf coating when removed.
Are adhesive shelf pushers strong enough?
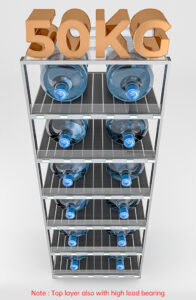
This is a common concern, especially with heavier products. Today’s adhesives—especially industrial-grade tapes like 3M VHB—can hold substantial weight if used correctly.
Strength ratings comparison:
| Adhesive Type | Holding Power (Per Pusher) | Shelf Compatibility |
|---|---|---|
| 3M VHB double-sided | Up to 10kg | All non-porous surfaces |
| Foam adhesive pads | 2–5kg | Temporary setups |
| Silicone-based glue | 8–12kg | Hard plastics, metal |
Tips to maximize adhesive strength:
- Stick during moderate temperatures (18–24°C).
- Press down firmly for 30+ seconds during application.
- Avoid stocking heavy items within 2 hours after installation.
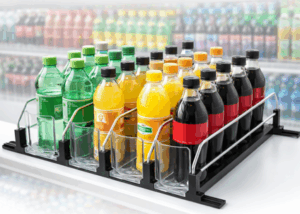
If you’re pushing beverage bottles or canned goods, reinforce the ends with transparent clips or rails to prevent shifting.
How can you remove shelf pushers without leaving marks?
If shelf pushers are being relocated or upgraded, clean removal is key to keeping fixtures reusable.
Safe removal techniques:
| Shelf Material | Best Removal Tool | Clean-up Product |
|---|---|---|
| Glass | Plastic scraper + alcohol | Glass-safe adhesive remover |
| Metal | Heat gun + scraper | Goo Gone or WD-40 |
| Wood (coated) | Dental floss + alcohol | Non-acidic cleaner |
Steps for clean removal:
- Warm adhesive slightly using a hairdryer or heat gun.
- Gently lift corners with plastic scraper.
- Wipe residue with soft cloth and alcohol.
- Don’t rush—ripping it off increases damage.
Avoid using knives or sharp tools. They scratch and chip easily.
Do pushers damage painted or coated shelves?
Yes—if installed incorrectly or with incompatible materials. Painted MDF, laminated wood, and powder-coated metal are all vulnerable to tearing or lifting.
What to avoid:
- Over-tightened clips that cut into paint.
- Harsh glue or solvent-based adhesives.
- Rough handling during placement or alignment.
Better options:
- Use cushioning pads between the pusher and surface.
- Choose neutral adhesives that don’t stain or react.
- For sensitive surfaces, go with removable pusher trays.
Maintenance tip:
Inspect every 3 months. If adhesive begins to shift, replace it before it causes wear.
How do you align pushers properly on different shelf types?
Even spacing is critical. Misaligned pushers not only look messy, they can create uneven product pressure—leading to shelf damage or poor performance.
Key alignment methods:
| Shelf Type | Recommended Tool | Tips |
|---|---|---|
| Wire shelves | Zip-tied guides | Use a template |
| Solid wood/metal | Measuring tape & level | Mark light pencil guides |
| Gondola shelves | Built-in rails | Use them as anchor lines |
Visual aids:
Consider using spacing jigs for high-volume installations. They prevent guesswork and speed up alignment.
Make sure the pushers are parallel and flush to shelf edges. Misaligned units can twist under product weight and scratch shelves over time.
Should pushers be installed before or after merchandising?
Always before. Installing after shelves are loaded leads to rushed decisions, awkward angles, and often—damage.
Workflow recommendation:
- Plan layout and spacing with empty shelf.
- Clean and prep shelf surface.
- Install pushers using your preferred method.
- Let adhesive settle (if applicable).
- Load merchandise and adjust as needed.
Benefits of pre-installation:
- Cleaner positioning.
- No need to unload products later.
- Prevents adhesive from being compromised by product weight.
What mistakes cause shelf damage during installation?
Most shelf damage comes from a few repeatable mistakes—usually from haste or poor prep. Here’s what to avoid.
Common installer mistakes:
- Applying pressure too hard when locking snap-on brackets.
- Misjudging shelf material strength.
- Using non-recommended tools (metal scrapers, box cutters).
- Skipping surface cleaning before adhesion.
- Ignoring pusher compatibility with shelf type.
Prevention checklist:
| Mistake | Safer Alternative |
|---|---|
| Rushing installation | Follow a standard checklist |
| Using sharp tools | Use plastic or silicone scrapers |
| Not testing placement first | Dry-fit before final mounting |
| Ignoring temperature guidelines | Install at room temperature |
A little patience and planning can preserve thousands in shelf replacements.
How do retailers protect shelves during pusher upgrades?
Upgrading an entire shelf system can be chaotic. But it doesn’t have to leave scars.
Protection strategies:
- Use removable liners under adhesive areas.
- Mask off delicate parts during installation.
- Test sample pushers before full rollout.
- Train staff to handle materials with care.
During bulk installs:
- Divide tasks by expertise—one team for layout, another for mounting.
- Assign a QC checker to monitor adhesion and alignment.
- Use padded carts and trays to avoid bumping or dragging tools on shelves.
Investing in quality installation now saves costs on shelf refinishing later.
Conclusion
Shelf pushers are essential tools for modern retail—but only when installed correctly. Damage-free installation depends on choosing the right tools, understanding shelf materials, and working with care. Whether you’re upgrading a single display or fitting out an entire supermarket, following the practices above will keep your shelves looking clean and professional.
If you’re looking for shelf pushers designed with safe installation in mind, Novaday provides OEM and ODM solutions tailored for every shelf type—especially in PET plastic injection systems trusted across Europe and North America. Reach out today to discuss your display challenges—we’re here to help.
#Hashtags
#RetailDisplaySolutions #ShelfPushers #StoreFixtures #RetailTips #NovadayDisplay