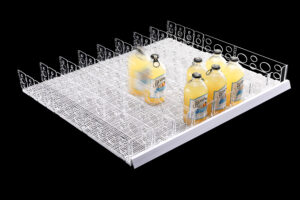
Shelf pusher systems help organize products and keep shelves neat. But installing one is just the first step. If you don’t take care of it, it won’t last long, and it won’t work well.
To keep your shelf pusher system working, you need regular maintenance. That means cleaning, checking, and fixing it when needed.
You may have just installed your system and assumed that’s it—but the real work starts now. Let’s walk through all the things you should do to make sure your shelf pusher keeps performing.
What should I check right after installation?
If your pusher system is brand new, you need to check a few things right away. This step is important. It helps you avoid problems down the line. Start by checking if everything is lined up properly. A small misalignment now can become a big problem later.
Check the basics:
- Make sure the tracks are straight
- Ensure pushers slide smoothly
- Test if the spring mechanism resets properly
- Confirm the end stoppers are tight
- Push items manually to see if they flow well
This step is not just about performance. It’s about safety too. A misaligned pusher can jam or break. Worse, it could damage your merchandise. Take the time to go item by item and shelf by shelf. You don’t need fancy tools. A visual inspection and a simple push test are enough. Some managers even use a checklist to ensure consistency.
Common Issues After Setup
| Problem | Cause | Fix |
|---|---|---|
| Pusher not moving | Misaligned track | Realign the track |
| Spring too tight | Incorrect tension setting | Adjust spring manually |
| Items falling off front | No end barrier or stopper missing | Install stopper or retighten it |
| Products getting stuck | Shelf lip or divider interference | Trim or reposition dividers |
If you find any of these early, you avoid bigger problems. It also prevents your team from getting frustrated with a system that doesn’t work properly.
How often should shelf pushers be cleaned?
Cleaning shelf pushers is easy to ignore—but it makes a huge difference. Dirt, dust, and spills can build up fast in busy retail stores. If pushers get dirty, they don’t slide well. That slows everything down and makes restocking harder.
For best results, clean shelf pushers once a week.
If your store handles liquids or small items, you might need to clean more often. Dust and sticky residue from spills are the main causes of buildup. You don’t need fancy cleaners. Warm water and a mild detergent work well. Avoid anything harsh that might damage the plastic.
Cleaning Checklist
- Remove products from the shelf
- Use a microfiber cloth or soft brush
- Wipe down pusher tracks and dividers
- Clean under and around the spring
- Dry everything fully before restocking
Do’s and Don’ts
| Do | Don’t |
|---|---|
| Use soft cloths | Use steel wool or abrasives |
| Dry parts fully | Let water sit in the mechanism |
| Use mild soap | Use strong chemicals or bleach |
| Clean during off-hours | Clean during store peak hours |
Keeping your system clean also gives you a chance to spot wear and tear early. Cleaning time is a great moment to check if springs are working or if anything is out of place.
Which cleaning products are safe to use?
Not all cleaners are shelf-friendly. Some chemicals can damage the pusher material. Since most pushers are made of PET or ABS plastic, stick to safe, non-corrosive products.
Use pH-neutral cleaners that are non-abrasive and alcohol-free.
The goal is to clean without scratching or softening the plastic. You also want something that won’t leave behind a sticky film. Even if a cleaner looks harmless, it can make plastic brittle over time if it’s too strong.
Best Product Types
- Diluted dish soap
- Glass cleaner (ammonia-free)
- PET-safe disinfectant sprays
- Warm water with a splash of vinegar (optional)
Avoid using these:
- Bleach
- Acetone
- Alcohol-based sprays
- Degreasers made for industrial kitchens
These harsh agents can make shelf pushers crack, yellow, or warp. They also leave strong smells that linger on merchandise. Your safest bet is always warm soapy water and a microfiber cloth. If you must disinfect, use PET-safe alcohol-free formulas.
What causes shelf pushers to jam?
Jams are common if you’re not careful. But they’re usually easy to fix—and even easier to prevent. The main reason pushers get stuck is friction. That comes from debris, misalignment, or too much weight on the pusher face.
Shelf pushers jam because of friction, dirt, or improper alignment.
It usually starts small. Maybe one item is slightly too wide. Maybe dust collected on the track. Over time, the spring has to work harder. Eventually, the pusher stops sliding at all.
Common Jam Triggers
| Trigger | Example | Fix |
|---|---|---|
| Misaligned rails | Tracks not perfectly parallel | Adjust the position |
| Debris in the track | Dust, spilled liquid | Clean the track thoroughly |
| Overloaded shelves | Too many heavy items | Reduce product count or weight |
| Broken spring | Worn-out or snapped spring | Replace the spring component |
| Warped plastic | Heat or stress over time | Replace affected part |
Don’t ignore early signs. If you notice uneven movement or resistance, stop and inspect. Continuing to force it will just cause more damage.
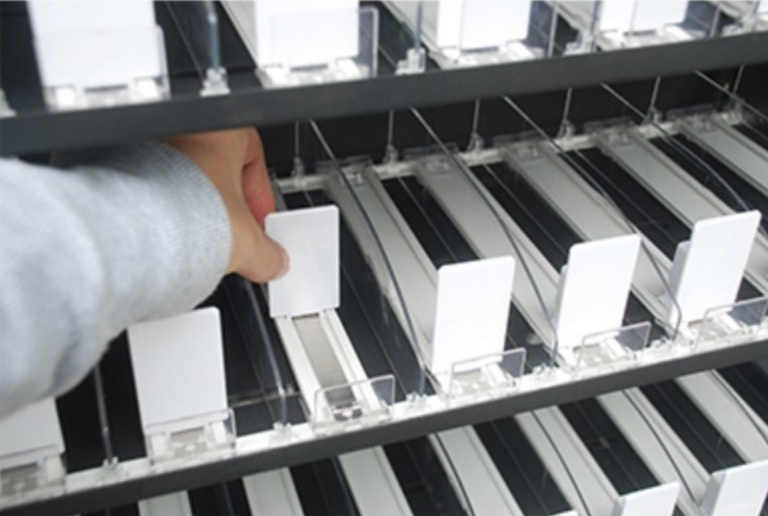
How can I fix a stuck pusher track?
If a shelf pusher stops working, the fix depends on the cause. Luckily, most issues don’t need a full replacement. You can fix them with simple tools and careful steps.
To fix a stuck pusher, realign, clean, or replace the spring mechanism.
Start by emptying the shelf. Check if the track is warped or blocked. If the pusher moves only partway, it’s likely dirt or an obstruction. If it won’t move at all, it may be a broken spring or shifted component.
Fixing Steps
- Remove the pusher unit from the track
- Inspect for cracks, dirt, or blockages
- Clean the track and spring mechanism
- Check the alignment using a straight edge
- Test the spring tension manually
- Replace worn parts with spares if needed
- Reinstall and test again
Most brands offer spare parts or simple replacement kits. If your system is modular (like Novaday’s), it’s even easier. You just snap off the damaged section and click a new one into place.