Skip to content


You can make your own P.O.P Display shelf, even if you have never used tools before. Building a diy project like this is fun and exciting. You get to show your favorite collectibles in a way that fits your style. Think about putting your Funko Pops on a shelf you made yourself. When you design your shelves, your collection becomes special. Some collectors use store fixtures that stay the same, but your shelf can change and grow with your collection.
Key Takeaways
- Making your own P.O.P display shelf is fun. You can be creative and show your style. You can put your collectibles on the shelf your way.
- DIY shelves help you save money. You can also change them to fit your needs. Store-bought displays do not let you do this. Pick materials and designs that fit your space and collection.
- Planning is very important. First, decide what your shelf will be for. Measure your space. Draw a simple design before you start building.
- Use easy tools and materials like wood, cardboard, or acrylic. Safety matters, so always wear safety gear when you work.
- Be creative with your display! Try different themes, lights, and colors. This will help your Funko Pops stand out and tell a story.
Why Choose a DIY P.O.P Display Shelf
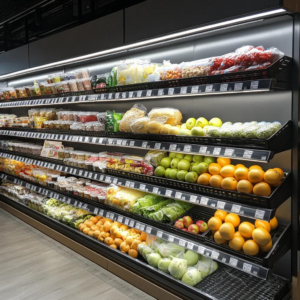
When you walk into a store, you might see a strong, eye-catching display like Nova Day’s Permanent P.O.P Display for Energy. This kind of display uses cold steel and bold graphics to grab attention. It works great for brands that want a long-term solution. But when you want something flexible for your home or collection, a diy p.o.p display shelf gives you more freedom.
Benefits for Beginners
You do not need to be an expert to start building your own display. You can use simple tools and easy-to-find materials. Many people choose to build their own shelves because they want a custom solution that fits their space and style. You get to decide how your shelf looks and how it works for your pops.
Tip: Building your own shelf gives you a sense of accomplishment. You will feel proud every time you look at your collection on a shelf you made.
Here are some reasons people love making their own display shelves:
- You can design the shelf to fit your room or wall.
- You get to pick the colors and finishes.
- You can change the shelf as your collection grows.
Cost and Customization
Buying a ready-made display can cost a lot. When you build your own, you can save money, especially if you already have some materials. You also get to make choices that store-bought shelves do not offer.
| Reason | Explanation |
|---|---|
| Customization | You can pick the size, shape, and look that matches your collection. |
| Cost-Effectiveness | You often spend less, and you can use materials you already have at home. |
You can also choose special features for your shelf. For example, you can pick the thickness and length of each shelf. You can use different supports, like brackets or hanging systems. You can even choose clear or patterned glass if you want a unique look. This makes your diy display a true custom solution.
When you build your own p.o.p display shelf, you get a display that fits your collection and your style. You can change it any time you want. Your pops will always have the perfect spot to shine.
Plan Your Display
Define Your Purpose
Before you start building, think about what you want your display shelf to do. Do you want to show off your favorite Funko Pops? Maybe you want to highlight a special set or theme. Your purpose will guide your choices.
Here are some things you should consider:
- Color: Bright colors can make your shelf pop and grab attention.
- Size: Make sure your shelf fits your space. It should stand out but not get in the way.
- Product Placement: Place your best or favorite items at eye level. This makes them easy to see.
- Lighting: Good lighting can make your collection shine.
- Graphics and Signage: Add signs or pictures to tell a story or share information.
- Material: Pick something sturdy that matches your style.
- Theme: You can create a story with your display. Maybe you want a superhero corner or a movie shelf.
Tip: If you want to change your display often, think about making it easy to move or update.
Measure and Sketch
Now, grab a tape measure and some paper. You want your shelf to fit just right. Here’s a simple way to get started:
- Print or draw a template of your shelf at full size.
- Tape the pieces together to see how big your shelf will be.
- Trace the shapes onto your material, like foam board or wood.
- Cut out the sides, shelves, and any risers you want.
- Plan where you want to add lights or extra features before you glue or screw anything together.
Drawing your design helps you see how everything will fit. You can change things before you start cutting.
Select a Style
You have lots of choices when it comes to shelf style. Some collectors like floating shelves for a clean look. Others pick stackable or wall-mounted shelves for more space.
Here’s a quick look at some popular options:
| Product Name | Description | Price |
|---|---|---|
| KUBBIE SLIM BLACK (1×7) | Wall Mountable & Stackable Pop Shelf (Cardboard) | from $24.99 |
| BITTY KUBBIE BLACK (3×3) | Wall Mountable & Stackable Pop Shelf (3D Printed) | from $16.99 |
| BITTY POPS in Acrylic Sleeves | Wall Mountable & Stackable Pop Shelf (3D Printed) | from $24.99 |
| CLASSIC | Wall Mountable & Stackable Toy Shelf (Cardboard) | from $34.99 |
You can also try floating shelves or even make your own design. Pick a style that fits your space and shows off your collection the way you like.
Materials & Tools for DIY Pops Shelves
Best Materials for Beginners
You want your pops to look amazing, so picking the right material for your shelf matters. If you’re just starting out, you’ll find some materials are easier to work with than others. Check out this table to see what works best for a beginner’s diy project:
| Material | Benefits |
|---|---|
| Corrugated Cardboard | Lightweight, easy to cut and assemble, cost-effective, and provides structural integrity when designed correctly. |
| Primed Pine Boards | Simple to paint, sturdy, and easy to cut. Great for wood shelves that last. |
| Acrylic Sheets | Clear, modern look, lets you see every pop in your case. Easy to wipe clean. |
You can use wood for a classic look or try acrylic for a modern twist. Cardboard works well if you want something quick and light. If you want your display to last, wood is a solid choice. For inspiration, think about Nova Day’s Permanent P.O.P Display for Energy. That case uses cold steel and UV graphics, which you can try later if you want a permanent case for your pops.
Essential Tools List
You don’t need a fancy workshop to build a shelf for your pops. Here’s what you’ll need:
- Wood glue for strong joints in your wood case or shelf
- Screws and nails to hold your wood pieces together
- Saws for cutting wood to the right size for your case or shelves
- Sandpaper to smooth out rough wood edges on your shelf or case
- Paint to give your wood case or acrylic shelf a custom finish
If you want to add acrylic panels to your case, you can use a simple acrylic cutter. Most of these tools fit in a small toolbox.
Safety Tips
Building a case or shelf for your pops should be fun and safe. Here are some tips:
- Learn how to use power tools safely before you start cutting wood or acrylic for your case
- Stick to basic craft tools and supplies for your first wood or acrylic shelf
- Keep your workspace clean so you don’t trip over wood scraps or acrylic pieces while building your case
Tip: Always wear safety glasses when you cut wood or acrylic for your case or shelves. Protect your hands and eyes so you can enjoy your collection for years.
Build Your DIY P.O.P Display Shelf

Prep Your Workspace
You want your project to go smoothly. Start by picking a spot with good light and enough room to move around. Clear off a table or use the floor if you need more space. Lay down some old newspaper or a drop cloth. This keeps paint and dust off your floor.
Gather all your tools and materials before you begin. Put your tape measure, saw, glue, and screws within reach. If you plan to paint your p.o.p display shelf, set up a small area for painting. Open a window or use a fan for fresh air.
Tip: Keep a trash bag nearby for scraps and wrappers. You will stay organized and finish your project faster.
Cut and Assemble
Now you get to see your project take shape. Measure your boards or cardboard again before you cut. Double-check your sketch. Use a pencil to mark where you want to cut. If you are making a lego display shelf, make sure each piece fits together like building blocks.
Cut your pieces slowly and carefully. Sand the edges if you use wood. This step keeps your p.o.p display shelf safe for your pops. Lay out all the parts on the floor. Check that everything matches your plan.
Start putting your project together. Use wood glue for wood, or strong tape for cardboard. Attach the sides to the back first. Add the shelves one at a time. If you want a lego display shelf with different levels, stack the pieces and check that they line up. For extra strength, add screws or nails where the pieces meet.
Note: Ask a friend to help hold pieces while you attach them. Teamwork makes your project easier and more fun.
Secure and Finish
You want your p.o.p display shelf to last. Make sure every joint feels tight. Press down on each shelf to test the strength. If you build a lego display shelf, snap the blocks together and check for wobbles.
Let the glue dry before you move your project. Read the label to see how long it takes. When everything feels solid, you can paint or decorate your shelf. Try bright colors or add stickers for a custom look. If you want your pops to stand out, use a bold color on the back of your p.o.p display shelf.
Add any final touches. Wipe off dust and check for sharp edges. Place your shelf against the wall or mount it if you want. Now you can fill your lego display shelf with your favorite pops. Step back and admire your work. You finished your project and made a display that fits your collection perfectly.
Callout: Take a photo of your finished project. Share it with friends or online groups. You might inspire someone else to build their own p.o.p display shelf!
DIY P.O.P Display Shelf Ideas

You want your pops to stand out, right? Let’s check out some custom display ideas that make your collection shine. You can try different shelves and styles to match your space and personality.
Floating Shelves
Floating shelves look clean and modern. You attach them directly to the wall, so you don’t see any brackets. This style works well if you want your pops to look like they’re floating in mid-air. You can arrange your pops in rows or mix up the heights for a cool effect. Floating shelves save floor space and let you show off your collection without clutter.
Tip: Try painting your floating shelf a bright color to make your pops pop even more!
Zigzag Shelves
Zigzag shelves bring a fun twist to your display. They use a zigzag pattern that maximizes space and fits many pops at once. You can place these shelves in corners or along a wall. The unique design grabs attention and gives your collection a playful vibe.
| Pros | Cons |
|---|---|
| Maximizes space | May not suit your room’s decor |
| Can fit many Funko Pops at once | Fixing it on the wall might take longer |
| Unique design | |
| Utilizes corner spaces |
Wall-Mounted Options
Wall-mounted shelves help you use vertical space. You can stack pops high and keep your floor clear. When you install these shelves, make sure you secure them to the wall. Pick hardware that matches your wall type and use tools like a stud finder and level. This keeps your display safe, especially if you have kids or pets.
- Secure shelves to the wall to prevent tipping.
- Choose hardware with the right weight capacity.
- Use a stud finder, level, and drill for a strong installation.
Stackable Designs
Stackable shelves let you build up as your collection grows. You can start with one shelf and add more later. This idea works well if you want flexibility. Stackable shelves are easy to move and rearrange. You can create a tall tower or spread them out across your room.
Upcycled Materials
Want to try a diy project that’s eco-friendly? Upcycled materials make great shelves for pops. You can use metal or reclaimed wood for your custom display ideas. Metal shelves are strong and durable. Reclaimed wood gives your display a unique look and helps the planet.
| Material Type | Advantages |
|---|---|
| Metal | Cost-effective, strong, versatile, recyclable |
| Reclaimed Wood | Eco-friendly, unique, often less expensive, local |
You have lots of ideas to choose from. Pick the shelf style that fits your collection and your space. Try new designs and make your pops the star of your room!
Display Your Funko Pops Creatively
Spacing and Arrangement
You want your collection to look amazing, right? When you display your funko pops, spacing matters. Try grouping your pops by character. Put different versions of the same character together for a themed look. You can also arrange pops by color or size. Place larger figures at the back and smaller ones up front. This creates a cool gradient effect and makes every pop easy to see.
If you have rare or valuable pops, give them a special spot. Use premium holders and place them where everyone can see. Here’s a quick list to help you organize:
- Group pops by character or franchise.
- Arrange by color for a rainbow effect.
- Put bigger pops in the back row.
- Highlight rare pops in the center.
Tip: Leave a little space between each pop. This keeps your display neat and prevents crowding.
Lighting Tips
Lighting can make your pops shine. LED strips work great for shelves. You can add colored lights or spotlights to highlight your favorite pops. Try backlighting or lower LED lights for half-moon shelves. This adds depth and makes your display pop.
Here are some lighting ideas:
- Use LED strips along the back of your shelf.
- Place spotlights above or below your pops.
- Try colored lights for a fun effect.
Note: Always check that your lights don’t get too hot. Pops stay safe and look their best.
Themed Displays
You can create a themed display your funko pops will love. Repurpose an old bookshelf or build your own shelf. Paint it in bright colors or give it a vintage look. Mix up shelf heights and depths to fit different pops. Use reclaimed wood or metal pipes for a unique style.
Add themed backdrops with wallpaper, fabric, or murals. Group pops by franchise, like Marvel or Harry Potter. Create a cityscape for Marvel pops or a castle for Harry Potter pops. Props and accessories make your display even more fun.
| Theme Idea | How to Create It |
|---|---|
| Marvel Cityscape | Use painted backdrops and tiny buildings |
| Wizarding World | Add castle murals and magic props |
| Vintage Shelf | Distress wood and use old accessories |
Callout: Get creative and let your personality shine through your display. Your pops will stand out and your collection will feel special.
Add Custom Touches
Paint and Graphics
You can make your shelf stand out with a splash of color. Pick paint that matches your room or your favorite Funko Pops. Try using stencils or stickers for cool shapes and patterns. Some people add comic book graphics or movie posters to the back of their shelf. This gives your custom project a fun vibe. If you want a bold look, paint the edges in a bright color. You can even use UV-reactive paint for a glowing effect under special lights.
Tip: Let each layer of paint dry before you add another. This keeps your shelf looking neat and smooth.
Branding and Signage
Branding helps your display feel professional. Start by thinking about what message you want to share. Do you want to show off your favorite franchise or create a call to action? Use colors that match your collection or product packaging. This makes your shelf easy to recognize. Place a small sign with your name or a catchy phrase at the top. Keep your message short and clear so everyone understands it at a glance.
- Think about your audience and what they like.
- Choose a spot for your sign that everyone can see.
- Group similar items together for a tidy look.
A simple sign or logo can turn your shelf into a real showpiece.
Personalization Tips
You can make your custom shelf one of a kind. Try building shelves in different shapes or sizes. Some collectors group their Funko Pops by franchise to tell a story. Others use wall displays to save space and add style. For something unique, create a Funko Pop terrarium by adding small plants or fake grass around your figures. Mix and match ideas until your shelf feels just right for you.
| Personalization Idea | How It Stands Out |
|---|---|
| Themed groupings | Tells a story with your collection |
| Wall-mounted displays | Saves space and looks modern |
| Miniature terrariums | Adds a playful, natural touch |
Callout: Your shelf should reflect your personality. Try new ideas and have fun with your custom display!
You just learned how to plan, build, and customize a diy shelf for your pops. You can try new ideas and materials as your collection grows. These shelves save money and let you change your display whenever you want. You can move your pops around or add more without buying a new shelf. Many collectors join online groups or forums to share photos of their pops and get advice. Show off your pops, ask questions, and connect with others who love pops as much as you do!
FAQ
How do I choose the best material for my DIY shelf?
You can pick wood, cardboard, or acrylic. Wood lasts longer. Cardboard is easy to cut. Acrylic gives your shelf a modern look. Try different materials to see what fits your style.
Can I use display cases and stands with my DIY shelf?
Yes, you can add display cases and stands to protect your pops. These help keep dust away and make your collection look neat. You can find many sizes for your shelf.
What is an acrylic riser stand and why should I use one?
An acrylic riser stand lifts your pops higher. You can show off figures in the back row. This makes your display look cool and helps everyone see each pop.
How do I make my shelf safe for kids and pets?
You should secure your shelf to the wall. Use strong brackets. Keep small parts away from kids. Make sure your shelf does not wobble or tip over.
Can I paint my shelf after building it?
Yes, you can paint your shelf. Pick colors that match your room or collection. Let the paint dry before you put your pops on the shelf.