Installing a lane pusher bottle organizer in your commercial fridge takes just three steps. You prepare the shelf, attach the aluminum rail, and insert the pusher modules. This simple process needs only basic tools like a measuring tape and cleaning supplies.
You can finish the whole installation in minutes, not hours. The design uses glue for flat shelves or clips for wire shelving. Once installed, the system keeps bottles neat and easy to reach. Your staff will restock faster, and customers will see products clearly. The lane pusher bottle organizer turns messy fridge space into a tidy display. You get better visibility and smoother operations without complex tools or hiring a pro.
Key Takeaways
- Install a lane pusher bottle organizer in three easy steps: get the shelf ready, put the rail on, and slide in the pusher modules.
- Use adhesive on flat shelves and clips on wire shelves; the Nova-day system attaches to the back wire without any tools.
- You can change the lane widths and housing angles (90° or 70°) to fit different bottle sizes and make products easier to see.
- Avoid common errors by keeping the surface clean and dry for a strong stick, and line things up right to stop pusher jams.
- After you install the system, test it with real bottles to make sure it works smoothly, and adjust it if needed.
Tools and Materials for Your Lane Pusher Bottle Organizer

Before you start, gather everything you need. Having the right tools ready makes the installation smooth and quick. You will not need any specialized equipment. Most items are already in your maintenance closet.
What You’ll Need
Start with a measuring tape and a spirit level. The tape measure verifies equal spacing between each pusher unit. The level checks that the track sits horizontally straight on the shelf. A non-permanent marker helps you mark temporary guide points during setup. These three tools take less than five minutes to use.
You also need cleaning supplies. A clean surface is critical for proper adhesion. Follow this simple cleaning process:
- Use hot soapy water with a microfiber cloth to scrub the shelf surface, removing grime and stains.
- Rinse thoroughly with hot water, then apply a food-safe sanitizer to disinfect the surface before installation.
Mild detergents work well for routine dirt removal. Food-safe sanitizers kill bacteria and pathogens after cleaning. Vinegar solutions offer a non-toxic option for removing mineral deposits and stubborn stains. Let the surface dry completely before you attach anything.
For the rail attachment, you need either adhesive or clips. The Nova-day system uses glue for flat shelves. Wire shelves require clips that fasten to the shelf grid. Check your fridge type before you purchase supplies.
The Nova-day beverage pusher features tool-free wire shelf attachment. It attaches directly to the back wire of your shelf. This eliminates the need for cable ties that other competitor products require for installation.
Components Included
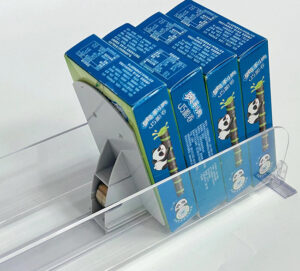
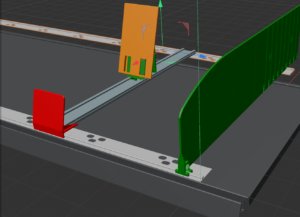
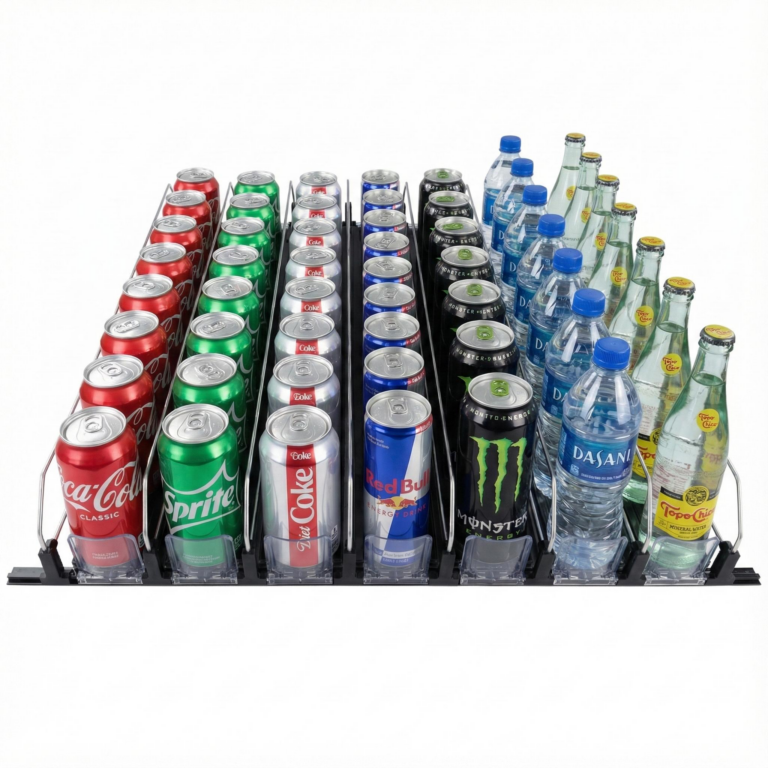
Your lane pusher bottle organizer kit arrives with all the essential parts. The aluminum rail forms the backbone of the system. This sturdy track provides a smooth sliding surface for the pusher modules. The rail attaches to your shelf using the adhesive or clips you prepared.
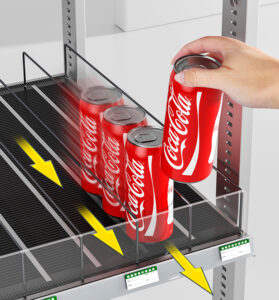
The kit includes plastic pusher modules. These units slide along the rail and gently push bottles toward the front. Each module uses a spring mechanism that maintains constant forward pressure. The easy-release front lock mechanism lets you reposition the entire system quickly during restocking.
Wire dividers come in the package as well. These self-adjustable dividers separate each lane and keep bottles upright. They flex to accommodate different bottle diameters without manual adjustment. The dividers prevent bottles from tipping sideways and maintain neat rows.
The complete package includes the aluminum rail, plastic pusher modules, wire dividers, and the front lock mechanism. You do not need to purchase any additional parts. The system works with glass bottles, plastic bottles, and cans. Once you have your tools and components ready, you can move to the installation steps.
Step-by-Step Installation Guide
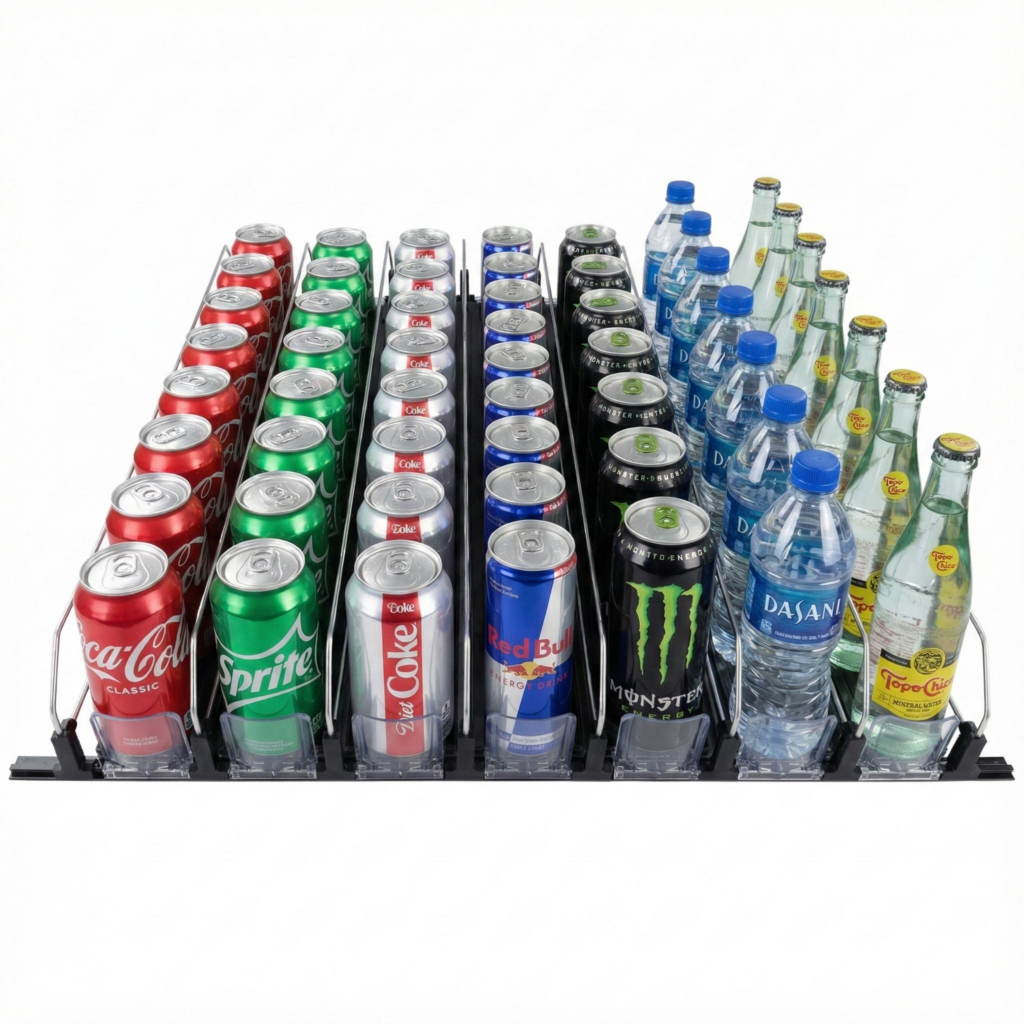
Now you have your tools ready and your kit unpacked. The installation follows a clear order. Each step builds on the one before it. Go slowly and work step by step. The whole job takes less than thirty minutes from start to finish.
Preparing the Shelf and Rail
Start with a clean, dry shelf surface. You already cleaned the area during your prep work. Check again that no moisture remains. Adhesive will not stick well to a wet surface. Wipe the shelf once more with a dry microfiber cloth if needed.
Measure your shelf depth before attaching anything. The pusher length should be a bit shorter than the shelf depth. This gap lets the pusher move forward and backward without hitting the back wall. Mark where you want the rail using your non-permanent marker. Use the spirit level to make sure your marks are level.
Now attach the aluminum rail. The method depends on your shelf type:
- Flat shelves: Put the adhesive evenly along the back edge of the rail. Press the rail firmly onto the shelf surface. Hold it in place for thirty seconds to make sure it bonds well.
- Wire shelves: Use the included clips to fasten the rail directly to the shelf grid. The Nova-day system attaches tool-free to the back wire of your shelf. No cable ties or extra hardware needed.
Wait for the adhesive to cure fully. Check the manufacturer’s instructions for the recommended drying time. This waiting period keeps the rail firmly in place during daily use.
Installing the Nova-day Beverage Pusher Modules
Once the rail is secure, slide the pusher modules onto the track. Each module clicks into place along the aluminum rail. The spring mechanism inside each module keeps steady forward pressure. This pressure moves bottles toward the front as customers take them.
Adjust the width of each lane to match your bottle sizes. The system supports adjustable width settings for different bottle and can sizes. Measure the diameter of your products first. Then set each lane to fit. Recommended lane widths vary by product type. For example, narrow lanes around 25mm work well for slim items like lip balm sticks. Medium lanes near 50mm suit standard shampoo bottles. Wider lanes around 65mm fit canned goods. The largest settings near 75mm handle juice cartons easily. Pushers come in widths from 25mm to 100mm or more. Pick the setup that fits your specific stock.
The self-adjustable wire dividers snap into place without special tools. These dividers flex to fit different bottle sizes on their own. They keep bottles upright and stop sideways tipping. Put the dividers between each lane to keep neat, tidy rows.
Set the housing angle for best visibility. The Nova-day system offers two options: a 90-degree vertical display and a 70-degree slanted display. The vertical angle works well for eye-level shelves. The slanted angle improves visibility on lower shelves. The slight 2-degree tilt within the housing boosts product visibility further. This small angle makes bottles easier to see and reach.
The easy-release front lock lets you move pushers without extra effort, saving time during setup and restocking. This feature makes the whole process smoother and cuts down on manual adjustment work.
Test the system with real bottles. Place several bottles in each lane. Watch how the pusher moves forward as you remove bottles. Check that bottles slide smoothly without jamming. Make sure the dividers keep everything upright. Adjust the width settings if bottles tip or wobble. Confirm the front lock works properly when you move the system.
Your lane pusher bottle organizer is now fully installed and ready for daily use. The whole process needs no special skills. Any staff member can finish the installation with little training. The modular design means you can change lanes quickly as your product lineup changes.
Compatibility with Commercial Fridges
Your commercial fridge may have different shelf types. The Nova-day Beverage Pusher works with flat shelves, wire shelves, and glass-door refrigerators. Knowing how to adjust the system for your setup helps it work best. This section covers width changes, housing angles, and how to install on different shelf materials.
Adjusting Width and Housing Angles
The system lets you adjust width in three steps. This flexibility fits different bottle and can sizes. Measure your products first. Then set each lane to the right width. The three-step adjustment gives you exact control without guessing.
Tip: Try adjusting the width in three steps for the best fit.
The housing angle matters for product visibility. You have two choices: a 90-degree vertical display and a 70-degree slanted display. The 90-degree angle works well for eye-level shelves. Customers see products straight on. The 70-degree slanted angle helps on lower shelves. Customers see bottle tops and labels more easily.
The system also has a slight 2-degree tilt inside the housing. This small angle makes a big difference.
The slight 2-degree tilt inside the housing tips products toward customers for better visibility and easier access, especially helpful on lower shelves.
This angle works with both the 90-degree and 70-degree settings. Together, they give your products the best visibility. Customers can find what they need fast. This improves shopping and boosts sales.
Using on Wire Shelves and Glass Doors
Different shelf types need different installation methods. The Nova-day system handles all common commercial fridge setups.
For flat shelves, use the adhesive method. Clean the surface well. Apply the adhesive to the aluminum rail. Press firmly and hold for thirty seconds. Let it dry fully before adding products.
For wire shelves, the system uses clips. The clips attach directly to the wire grid. No cable ties or extra hardware needed. The rail attaches tool-free to the back wire of your shelf. This makes installation quick and secure.
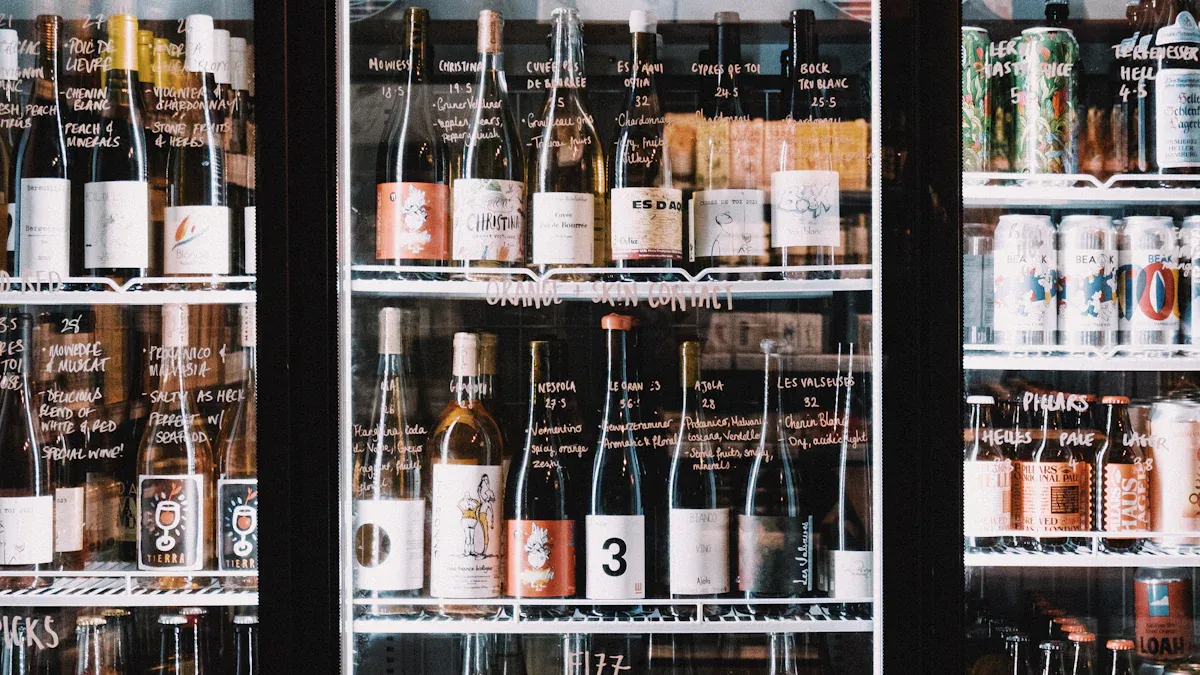
Glass-door refrigerators need careful planning. The system works well with glass doors. The 2-degree tilt helps customers see products through the glass. The slanted 70-degree angle works especially well in lower sections. Products tilt forward and become visible through the door.
The lane pusher bottle organizer fits both home and commercial fridges. This versatility makes it a smart choice for any business. You can use the same system across different fridge types. Standardize your setup without buying separate products for each fridge.
Avoiding Common Installation Mistakes
Even a simple installation can have problems. Most problems come from small mistakes during setup. You can avoid these with careful preparation and a few quick checks. This section talks about the most common mistakes and shows you how to fix them.
Ensuring Proper Adhesion and Alignment
The rail not sticking is the most common problem. This issue usually comes from a dirty or damp surface. You cleaned the shelf earlier, but check again before applying adhesive. Wipe the area with a dry cloth again. Any residue from old labels or sticky tape will weaken the bond. Use a food-safe degreaser if you see any film on the surface.
Apply the adhesive evenly along the rail’s back edge. Press firmly and hold for a full thirty seconds. If you rush, the glue will have weak spots. Let the adhesive dry completely before loading bottles. Check the manufacturer’s drying time and follow it closely.
Alignment issues cause other problems. A rail that is not straight makes pushers move unevenly. Use your spirit level to check the rail is straight. Adjust before the adhesive dries. Once dry, you can’t move the rail without taking it off completely.
The Nova-day aluminum rail uses a strong build that keeps its shape under constant use. Proper alignment helps the springs work smoothly for years.
Fixing Pusher Jams and Bottle Tipping
Pushers get stuck when something blocks the track. Check for dirt or spilled drinks inside the rail channel. Clean the track with a dry cloth. Check each pusher module sits flat on the rail. A tilted module gets stuck on the track edges and can’t move.
Bottles falling over usually means your lane width is not right. Measure your bottles again and adjust the width settings. The three-step adjustment lets you control it exactly. Set the dividers close to the bottles without pressing them too hard. The self-adjustable wire dividers bend to hold different sizes securely.
The front lock mechanism may not lock if you put it in backward. Check the direction against the instruction manual. The lock should snap into place with a little push. If it feels loose, take the module out and put it back in.
Your lane pusher bottle organizer works well when you test it after you install it. Place bottles in each lane and watch how it moves. Remove several bottles to make sure the pusher moves forward smoothly. Fix any problems right away instead of waiting for them to get worse. These small checks save you time and trouble later.
You now know the simple process to install a lane pusher bottle organizer. Start by preparing the shelf with a thorough cleaning. Attach the aluminum rail using adhesive or clips. Insert the pusher modules and adjust the width settings. Finally, set the housing angle for your fridge type. The system improves organization and makes restocking faster. Products stay visible and easy to reach for customers. You can complete the setup in under thirty minutes.
Test the organizer with a few bottles. Place them in each lane and watch the pusher move forward. Adjust the dividers if bottles tip. Nova-day offers a durable, cost-effective solution. It works in both domestic fridges and commercial refrigerated counters.
Check out our Beverage Pusher at nova-day.com for more details and to purchase.
FAQ
What bottle types work with the system?
The system works with glass bottles, plastic bottles, and cans. This flexibility makes it suitable for nearly any beverage you stock in your commercial fridge.
How do you install the rail on wire shelves?
Use the included clips. The Nova-day rail attaches tool-free to the back wire of your shelf. No cable ties or extra hardware needed.
Can you adjust the lane width for different bottle sizes?
Yes. The width adjusts in three stages. You can match each lane to your specific bottle or can diameter for a secure fit.
What housing angles does the system offer?
Two options: 90-degree vertical for eye-level shelves and 70-degree slanted for lower shelves. A 2-degree tilt inside the housing improves visibility further.
Is the system suitable for commercial refrigerators?
Yes. It works in both domestic fridges and commercial refrigerated counters. The durable construction handles heavy daily use.