Skip to content


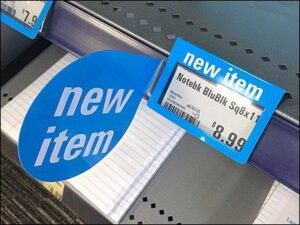
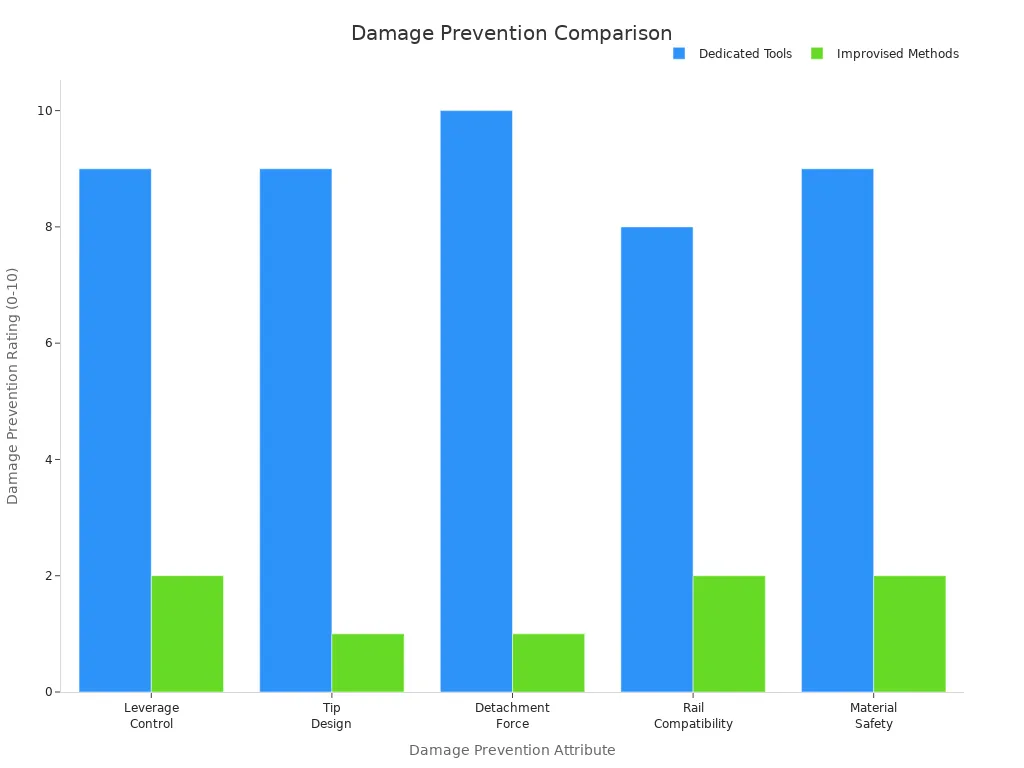
Removing electronic shelf labels with improvised tools often cracks the labels, bends rails, or scratches shelves. This damage costs you time and money. A dedicated electronic shelf label removal tool solves this problem completely.
This esl removal tool safely detaches labels from mountings without harm. You avoid costly repairs and keep your retail displays professional. The tool works with various ESL models, making it a smart investment for any retail environment.
In this article, you will learn what this esl removal tool does and how to use it step by step. You will also discover common removal mistakes to avoid. Proper removal techniques keep your labels functional. Understanding ESL removal helps you maintain your digital pricing system. Every removal you perform correctly extends the life of your labels. ESL removal becomes simple with the right tool. Your labels remain protected during every change.
Key Takeaways
- Use a special ESL removal tool to safely release labels without bending rails or cracking cases.
- Put the tool in softly, push with steady pressure, and slide the label out so it stays safe each time.
- Do not twist, pull hard, or use metal tools. These actions can scratch or break the labels.
- Clean sticky leftover with soap, alcohol, or heat, and use a plastic scraper to keep shelves safe.
- Proper removal keeps your labels and rails working well, saving you money on replacements.
Electronic Shelf Label Removal Tool Overview
What Is an ESL Removal Tool?
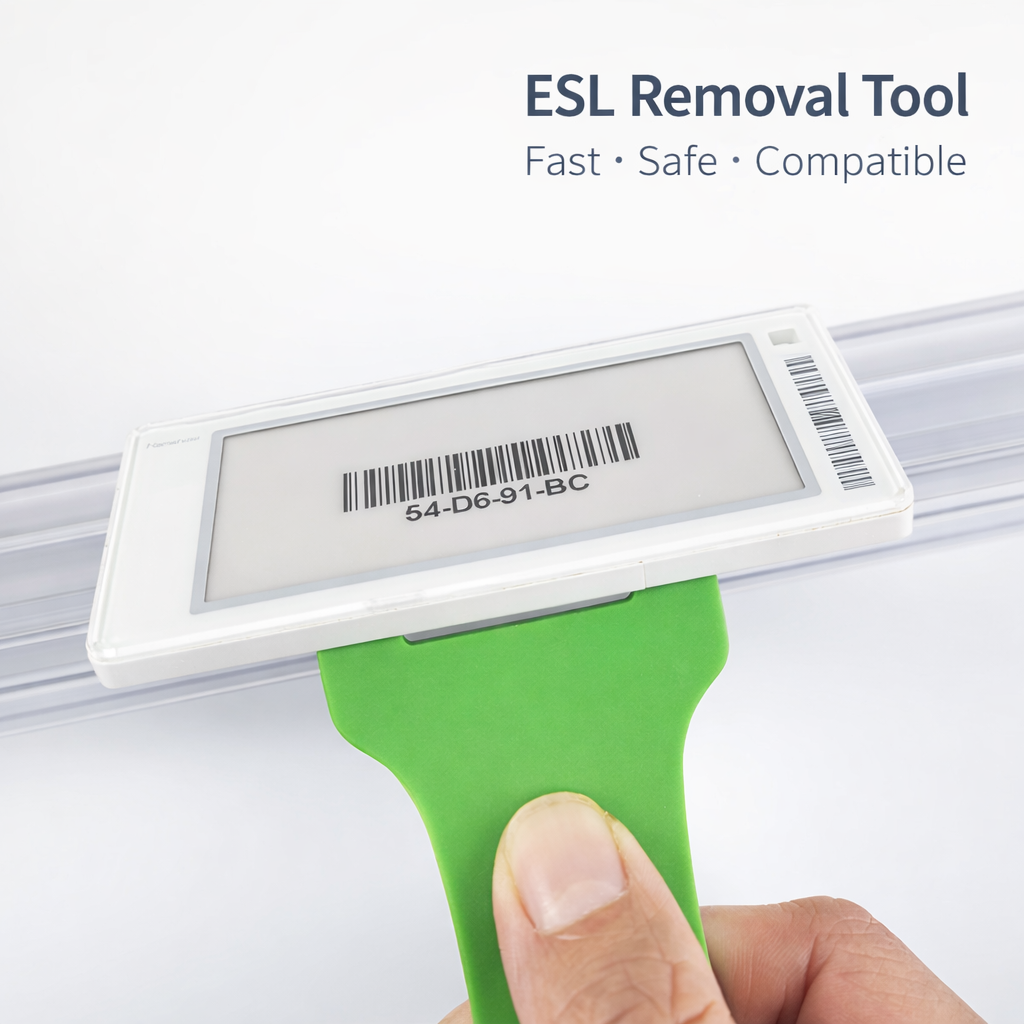
An electronic shelf label removal tool is a small hand tool. It helps you remove ESLs from their rails safely. The tool works with the lock inside each label holder. You put the tool into a slot, push gently, and unlock the spring. The label then comes out easily without force.
The design stops the damage that happens with other tools. When you use a pry bar or your fingers, you push unevenly. This uneven force bends rails and scratches shelves. The special tool applies steady leverage at the right angles. It releases magnetic, clip, or friction attachments easily.
The tool works as a go-between for you and the lock. This middleman role adds safety. Only workers with the right tool can remove the ESL. The spring lock keeps the label in place until you use the correct tool. This process keeps both the label and the rail safe.
Nova-day ESL Removal Tool Features
Nova-day’s ESL removal tool has several key features for stores. The tool removes labels safely with its rounded, smooth tips. These tips make tiny scratches on rails less likely. The force needed to remove a label is between 8 and 14 N. This force range stops rails from bending but still works well.
This tool works with most ESL brands and models. You don’t need separate tools for different systems. It fits V-slot, T-slot, and flat-mount rails. This flexibility makes your work easier.
The tool is made of strong ABS plastic. This plastic resists chemicals and won’t harm painted or coated rails. Unlike metal pry bars, ABS won’t rust or leave scratches. The tool comes in custom colors. You can pick a color that matches your store’s brand.
| Feature | Benefit |
|---|---|
| Universal Compatibility | Works with most ESL brands and models |
| Durable ABS Material | Withstands daily use in retail settings |
| Easy Operation | No training needed for staff |
| Safe Removal | Prevents damage to labels and shelves |
| Custom Colors | Matches your store’s branding |
The simple design lets any worker use it without training. You put in the tool, push, and the label releases. This saves time when updating products. The tool is built to last in busy stores. Each removal you do protects your ESL investment.
Step-by-Step Guide to Remove ESL Labels

Preparing for Safe Removal
Before you start, get your esl removal tool and check the label area. Look at the rail type and how the label locks. Different rails use different lock styles. Knowing your rail type helps you pick the right method. This prep keeps both the label and the mounting system safe.
Clean the area around the label first. Dust and dirt can block the tool’s grip. A clean surface lets the tool slide into the slot easily. You also lower the chance of scratching the rail during removal. Take a moment to look at the label’s condition. A label with cracks or loose edges needs extra care. Handle these labels gently so they don’t break more.
Stand directly in front of the label. Position yourself at a comfortable height so you can push with steady pressure. Hold the esl removal tool firmly but not too tight. Your grip should feel relaxed and in control. This stance gives you better control during the whole removal process.
Removing Labels from Different Rails
The removal process follows a simple order. Each step builds on the one before it. Follow these steps carefully for every label you remove:
- Put the Nova-day tool into the slot next to the label.
- Push with steady pressure without forcing the tool or twisting the sticker.
- Release the locking system by pressing the tool gently.
- Slide the label out with a smooth motion.
This order works for most rail types. V-slot rails need a straight insertion angle. T-slot rails need a slight upward tilt. Flat-mount rails work best with a level approach. The tool’s universal design adjusts to each style on its own.
Note: Avoid pulling the sticker directly. Do not use metal objects. Never twist the label during removal. These actions can break the label or leave sticky residue on the shelf.
Alert: Never use too much force. Always match the tool to the label type. This step prevents damage and keeps your price tag holder in good shape.
Different rail materials also change your technique. Plastic rails bend a little under pressure. Metal rails stay stiff and need a stronger touch. The tool’s ABS build works safely on both surfaces. You never worry about scratching painted or coated rails.
Practice on a few labels first. Start with labels on standard shelf rails. Work slowly and feel how the lock releases. You will notice a small click when the mechanism opens. That click tells you the label is free. Then you slide the label out without any resistance.
The whole removal takes seconds once you learn the technique. You can update dozens of labels in minutes. This speed matters during busy restocking times. Your staff can learn the process quickly. No special training or technical knowledge is needed.
Remember to remove esl labels one at a time. Do not rush or try to remove several labels at once. Each label needs your full attention. This careful method ensures every removal goes smoothly. Your labels stay working and your rails stay undamaged.
The removal process protects your investment in digital pricing technology. Every label you remove correctly keeps working for years. Every rail you protect avoids costly replacements. This simple tool makes the whole process safe and efficient for any retail store.
Troubleshooting ESL Removal and Cleanup
Removing Adhesive Residue
After you take off an esl label, sticky glue often stays on the shelf. This leftover adhesive looks messy and pulls in dust. You need the right way to clean it without harming the shelf surface.
Start with the mildest option first. Warm water mixed with dish soap works fine for light residue. Use a soft cloth to apply the mix and rub in circles. For tough spots, try rubbing alcohol on a cotton ball. The alcohol breaks the glue bond fast. Hand sanitizer also works since it has alcohol and a gel texture that sticks to the residue.
For thicker glue layers, heat softens the bond. Use a hair dryer on low for one to two minutes. Keep it about six inches from the surface. The warmth makes the sticker glue soft, so you can scrape it off with a plastic scraper. Never use a metal blade. Metal leaves permanent scratches on glass, plastic, and coated surfaces.
Store-bought products like Goo Gone or WD-40 give another option. Put the product on, wait a few seconds, then rub with a cloth. After using WD-40, wash the area with soap and water. The oily film from WD-40 pulls in dust if you skip this step.
Natural choices work as well. Cooking oil, peanut butter, or mayonnaise break down glue bonds. Put on a small amount, let it sit, then wipe clean. Vinegar acts as a natural cleaner for lighter residue.
Four rules to protect your shelves:
- No metal blades – use a plastic scraper.
- Acetone ≠ plastic – it melts ABS, acrylic, and painted finishes on contact.
- Heat gun on low – keep at least 20 cm away; 200°C close up warps plastic.
- Clean after WD-40 – its oily film attracts dust; follow up with dish soap and water.
Common ESL Removal Mistakes to Avoid
Many removal issues come from simple errors. Twisting or prying the label causes casing stress, screen cracks, or PCB damage. You must use steady pressure only. Pulling straight on the label bends or snaps connection points. Slide the label out smoothly after releasing the locking clips.
Using metal objects creates scratches and static electricity. Always use the proper esl removal tool. Too much force means the label will not come off. Check tool compatibility and insertion point again. Do not push hard.
Ripped labels tear during removal. Use the tool to lift leftover pieces, then clean with residue removal methods. Damaged holders need replacement to keep proper display and security. Shelf scratches need buffing for light marks or touch-up paint for deeper damage.
Surface-specific issues need attention. Plastic scratches easily, so use light pressure. Glass can chip, so remove slowly. Metal can bend, so keep the shelf steady. A clean, scratch-free label is simpler to remove. Regular upkeep stops many problems before they start.
The right technique protects your esl system. Each mistake you avoid saves money on replacements. Each correct removal keeps your labels working well. Your shelves stay clean and neat with proper care.
Using a dedicated electronic shelf label removal tool is the only reliable way to take off ESLs without causing damage. You get the area ready, place the tool in the right spot, and push with light pressure. This method keeps your labels and rails safe every time.
The Nova-day esl removal tool offers safety, works with many systems, and is simple to use. You take off labels quickly without scratching surfaces or cracking the cases. Your staff picks up the technique in minutes. Your store avoids expensive replacements.
Buy a quality tool today. You protect your ESL investment and make daily tasks run smoother. Proper removal keeps your digital pricing system working without problems for years.
FAQ
What tool removes ESL labels safely?
Use an electronic shelf label removal tool. It releases the locking system without bending rails or cracking cases. Metal objects create scratches and static. The proper tool keeps your labels safe.
How do you clean sticky residue from the shelf?
Use a plastic scraper to remove thick residue. Then apply rubbing alcohol or Goo Gone to dissolve the remaining glue. Warm soapy water works for light residue. Never use metal blades. They scratch the surface.
Can you reuse an ESL after removal?
Yes, if you remove it correctly. The esl removal tool prevents damage to the label casing and connector. A clean label with no residue reattaches easily. Check for cracks before reinstalling.
Why does the removal tool avoid damage?
The tool applies steady pressure at the correct angle. It releases the lock without twisting or prying. This prevents damage to the rail and the label. Plastic rails bend less. Metal rails stay scratch-free.
What if residue stays after cleaning?
Heat the residue with a hair dryer on low for one minute. The warmth softens the glue. Scrape gently with a plastic tool. Repeat if needed. The residue comes off without harming the shelf surface.